Skip to Main Content
Back to Navigation

Step-by-Step Pool Liner Repair: How to Patch a Pool Liner

Four children are smiling on the edge of a backyard inflatable pool. The pool is blue and aqua colored, and there is water splashing in the background as they kick.

There’s nothing like spending warm days in a backyard pool. But after a summer of swimming, splashing, and fun, your above-ground pool might be a little worse for wear. It's common to get a small tear or rip in the vinyl pool liner. If left unrepaired, a pool liner tear can cause excessive leaking, damaging your deck or yard.

Fortunately, pool liner repair is an easy fix! Below, we'll show you step-by-step how to patch a pool liner so you can get back to swimming!

How to Find a Leak in a Pool Liner

A blue piece of vinyl pool lining is darker around a tear, showing where there’s a leak in the pool.

So how do you find a leak in your pool liner? If you suspect a leak, you might notice that water seems to be seeping out onto the ground or deck below. You may also notice that your water levels suddenly drop more drastically than usual. If you're doing regular pool maintenance, you'll likely notice the leak right away. It's especially important to watch for leaks in an older liner before it becomes a large tear.

A visual inspection is the first step for finding a leak in your pool liner. Walk around the pool and look for any spots where water seems to be seeping out onto the ground. Sometimes this is easier said than done, especially if the leak is small or your pool is in a shadier spot in the yard.

Check the liner for wrinkles. A good indication of a pool leak is a wrinkle or gathered spot in the liner. This indicates where tears may have formed in the pool liner.

If you don't see a tear inside the pool and can find the leak spot on the ground, you can use a simple dye test to find the leak. Use food coloring or special pool dye to pinpoint the leak location. As water leaks out of the pool, the dye will be pulled toward the hole, giving you a clear idea of where to patch.

Can You Patch a Pool Liner?

If you’re wondering if you can patch a swimming pool liner, the answer is a resounding yes! In fact, patching your pool liner is a super easy DIY job that any backyard pool owner can do. It’s a regular and necessary part of pool maintenance. 

Of course, repairing the pool liner is much preferred to buying a new liner or a whole new pool. With a few regular repairs and pool maintenance, your above-ground pool can last for many years. There’s no need to buy a new pool or a replacement liner. 

The DIY approach to pool liner repair is quick and inexpensive (while even a smaller backyard pool is an investment). You’ll protect the life and health of your pool by addressing any leaks quickly before they start to cause further cracks and degradation. It’s well worth the effort and a fairly simple fix. 

Pool Repair Tools: What Patch Should You Use? 

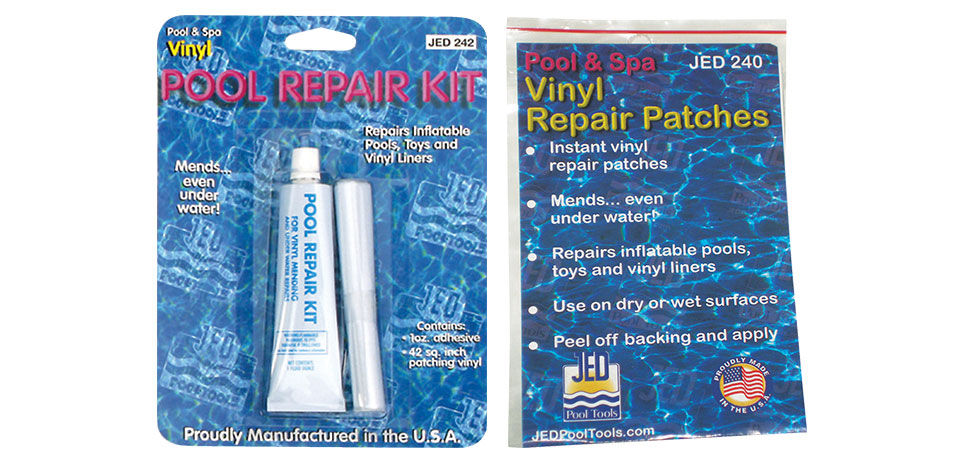
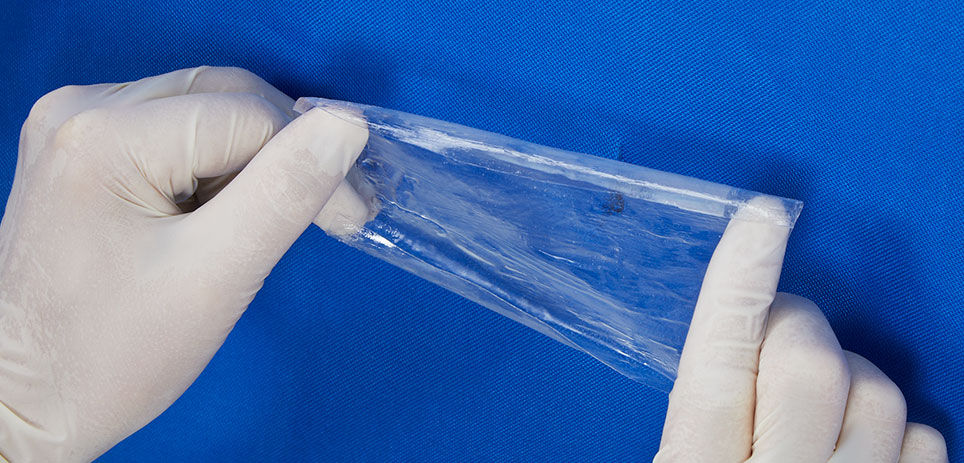
When it comes to pool liner repair, you have a lot of options. You could use waterproof tape, a vinyl patch kit, peel-and-stick patches, or a pool liner repair kit. 

For small rips and quick fixes, waterproof tape can hold the liner together and quickly stop leaks. The main issue is that many types of waterproof tape aren't designed for long-term underwater use. Waterproof tape can also be unsightly. But if you need a quick fix, waterproof tape is a simple option for small repairs. 

For the best results, use a tool designed for the application. Vinyl patch kits and pool liner repair kits are often your best bet for quick and easy pool liner leaks since they're made especially for repairing backyard pools. These simple kits are often very affordable and specifically designed for the task at hand. 

Your local Do it Best will have several pool repair kit options. Choose the best material for your pool and the tear type. For example, patches can cover puncture wounds and holes better than epoxy-type vinyl repair kits. However, vinyl repair kits are ideal for patching tears, cracks, and small leaks. 

Steps to Patching a Pool Leak

When you know that you have a leak and select the proper repair kit for the job, your next step is to apply your patch and repair the leak so you can get back in the water. Follow these steps to learn how to patch a pool liner.

Step 1: Locate the Tear 

Using the methods outlined above, locate the tear or source of the pool leak. Assuming that the tear is in your pool liner, the dye method is usually one of the most successful ways to detect a backyard pool leak. You may need to call a pool professional for serious damage or deep underwater repairs. Otherwise, applying pool patches to small holes or using an underwater repair kit is an easy fix that most pool owners can DIY.


When repairing a pool liner, you want to cut the vinyl material to cover five times the diameter of the hole. That way, you'll ensure that you cover the entire pool liner rip, even if it spreads after applying the patch.

For tiny tears, you can use a vinyl patch. The clear vinyl patches are stickers you place over the top of the hole. The drawback of stickers is that they offer less customization and can't be removed and repositioned after you've put them in place. Depending on their size, they can cover a small leak but won't offer much coverage for the surrounding area if it spreads. 

Step 3: Clean the Area

If you’re applying the patch to an area above the water, such as the edge or lip of the pool, you’ll want to be sure that you clean the area thoroughly and dry it before applying the patch. Use a bit of rubbing alcohol on a rag or cloth to remove any dirt, dust, or residue in the area and apply the patch.

For underwater tears, it may seem like a good idea to drain the pool, but you should avoid that tactic (unless it’s recommended on your particular pool repair kit instructions). Draining the pool can often cause the liner to slip and wrinkle, making it harder to fix and repair on your own. Fortunately, most pool repair kits are made to use and adhere underwater. Use a towel or rag to wipe the area around the tear gently.

Wear gloves while working to avoid getting oils from your hands on the vinyl or adhesive.

Step 4: Apply the Patch to Your Pool Liner

A person wearing gloves uses a brush to apply adhesive to vinyl for a pool liner repair. A small can of pool liner repair epoxy is on the surface near their hands, and a set of red-handled scissors is in the background.

If you’re using a pool liner repair kit, you’ll need to cut the vinyl with at least a two-inch border around the sides of the tear. Then apply the adhesive to the back of the vinyl, being sure to coat the entire back surface of the patch generously. It’s important to use plenty of adhesive to avoid getting bubbles in the patch. 

For above-water tears, center the patch over the hole and press down firmly to smooth the patch's edges. Work outward from the center, pressing all sides to squeeze out the excess adhesive. Hold the patch in place with one hand, smoothing down the edges of the pool liner patch with the other.

For tears below the water line, you'll need to dive under the water to place the patch over the damaged area. It's important that you make sure someone is nearby to assist you should you require help. Wear goggles to help you see where you are placing the pool liner patch. Applying the patch is a similar process to above-water tears—press the patch firmly and smooth the edges from the center outward.

Step 5: Let the Pool Liner Patch Dry, and You’re Done!

A person uses their gloved fingers to stretch a vinyl repair patch over the top of a blue pool liner with a tear.

It may sound counter-intuitive to let a patch dry when you’re working underwater, but generally, you should give it 24 hours to set with a full cure. This means avoiding using the pool. For above-water repairs, keep the area dry as the patch sets. 

The edges should be firmly adhered when you check the patch after 24 hours. If you notice that the edges are peeling or curling, it's best to gently remove the patch and redo the process with a second patch. If your pool repair kit advises draining the pool before repairing, you'll want to wait until the patch is completely set before refilling the pool. 

Keeping Your Pool Liner in Good Repair

Once the pool liner patch has dried, you can safely enjoy your pool again, just as you did before. It's essential to remember that pool liner patches don't last forever. Chances are, you'll need to replace the patch every few years to prevent the leak from reoccurring.

Periodically check the patch to ensure it's still in good shape. Even if you need to purchase another pool patching kit, it's much cheaper than buying a new pool liner.

Getting a hole in your pool liner is a minor issue with a simple fix. Take the time to pick up a pool liner repair kit from your local Do it Best, and you’ll save thousands of dollars on replacing your pool. Enjoy the summer sun and fun with a leak-free backyard pool!

test

Elements of a Great Outdoor Kitchen

Seven items to add flair and excitement to your next backyard barbecue

Learn more
test

How to Apply Deck Stain

Simple DIY tips for cleaning, prepping, and staining your deck

Learn more
test

5 Reasons to Add a Backyard Griddle to Your Outdoor Kitchen

Find out why these flat-top wonders are the hottest trend in outdoor cooking!

Learn more
test

Grilling Accessories & How to Use Them

Check out these helpful tools to expand your grilling capabilities

Learn more
test

Guide to Cooking with a Fire Pit: Tips and Considerations

Get ready to cook more than just marshmallows in your backyard this summer

Learn more